Shy Bot: Computer Vision in an AI world
Table of Contents
I am working on a robot that mirrors the orientation of a human's arm but shies away if the human gets too close.
The mirroring uses the motion capture SMPLest-X model [0] and creates the same pose on the robot arm with inverse kinematics.
The shying away is imitation training using Google's MediaPipe Hand Landmarker to extract hand 3D positions.
Read on if you're curious about how human bodies are represented and inferred by modern ML models or how computer vision pipelines turn imagery into robot behaviors.
Parametric Body Formats
Human bodies are beautiful. But they don’t actually vary as much as you'd think. With just ten decimal numbers, we can create a 3D model that accurately represents a single human adult body .
All the 3D models that the SMPL specification supports.
I used the SMPL family of body formats in the motion capture. The SMPL (Skinned Multi-Person Linear) model was created by scanning thousands of adult bodies. Using a 3D camera, they recorded the positions of millions of points that outline the bodies in 3D space.
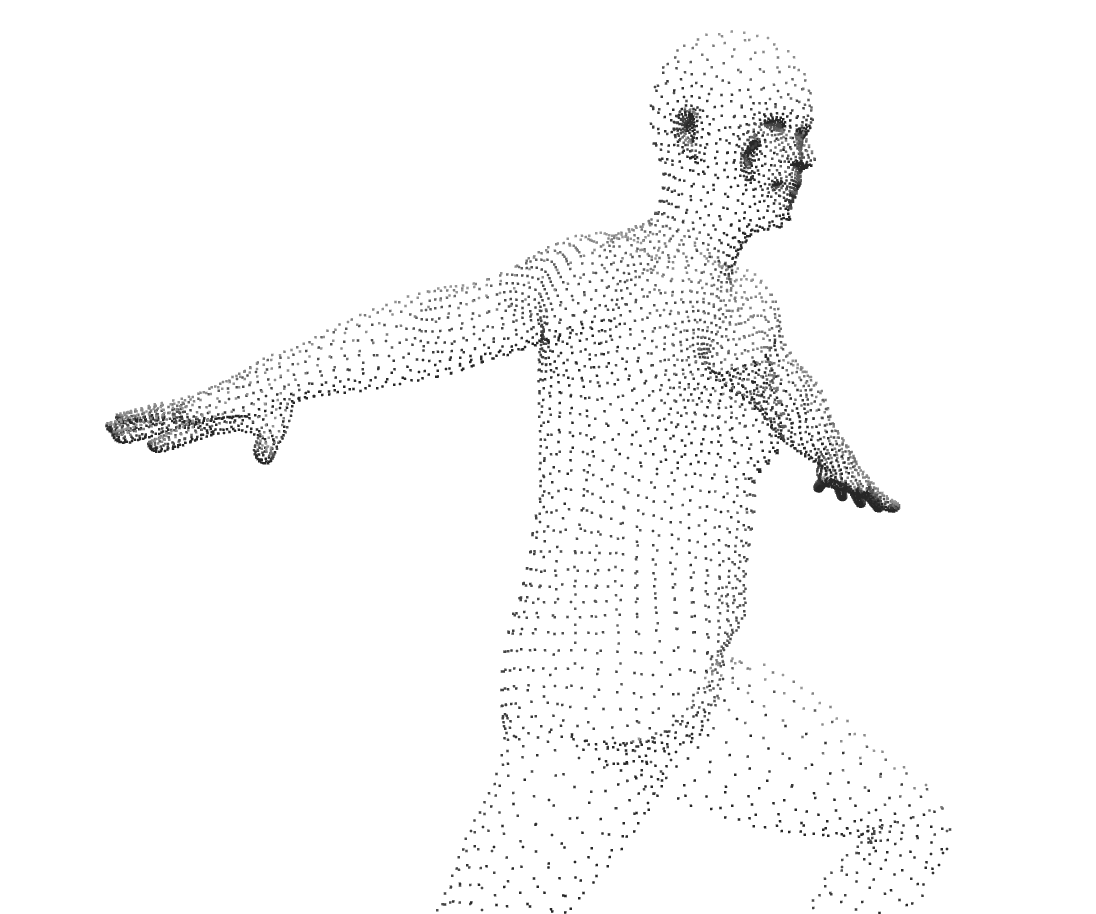
Fundamentally, 3D objects are made of points (vertices) and flat surfaces that connect those points (faces). The creators of the SMPL model used all the scans to come up with an average body: a fixed set of about ~7000 points and the surfaces between them.
Each of the ten decimal numbers I described earlier aren't measurements of neck size or limb length or waist circumference. They're based on observing correlation between parts of people's bodies (principal component analysis) e.g. taller people tend to have longer arms.
We use the ten numbers to tweak the average body in specific, albeit sometimes unintuitive, ways to represent a person’s body. In more detail, the SMPL creators found how much point positions correlate with each other and calculated common ways to move all the points (eigenvectors and eigenvalues) that represent biggest correlations. So the SMPL specification actually includes the position of the points in the average body and each of these eigenvector/eigenvalue pairs to adjust it.
However, this only represents a person’s body in a specific resting position. We also need a compact representation of bodies in different poses.
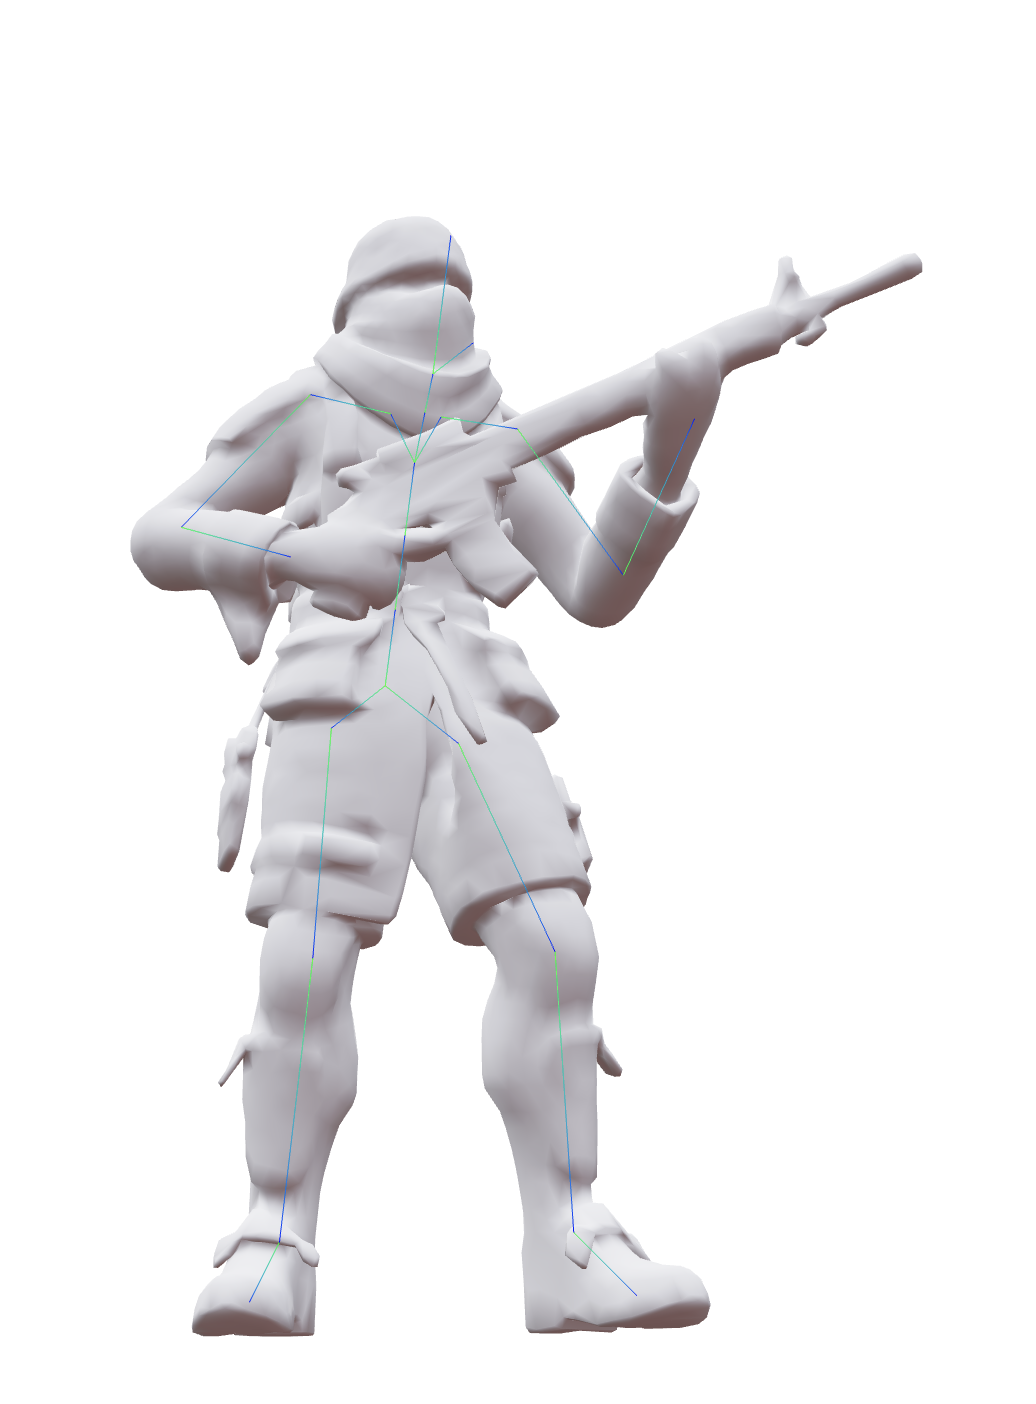
In 3D animation, animators place an invisible skeleton inside 3D characters. Animators pose the 3D character by rotating the joints that connect the invisible bones. Almost like a puppet show, when the joints are rotated, the points that make up the 3D object move with them.
Like a real human body, the joints don’t move and rotate independently. When you rotate the arm in the shoulder, the forearm and hand and fingers all move with it.
Usually, 3D animators set up constraints on the joints, position a specific joint where it should be (e.g. a character's wrist), and then use inverse kinematics to calculate how the other joints in the skeleton should be positioned while still satisfying those constraints.
In the human body, every movement of the body affects the rest of the body in some way and there’s not a strict hierarchy. But in the 3D world, the pelvis is usually the top of the hierarchy and every other joint inherits the changes from the pelvis or a descendant joint of the pelvis. For example, the foot inherits from the lower leg, the lower leg inherits from the thigh, and the thigh inherits from the pelvis.
In SMPL, there’s a joint system as well. While the joints ultimately move the points in the 3D body, we actually determine the starting positions of all the joints by using the points (e.g. the position of the shoulder joint is the weighted sum of these points around the shoulder).
But thereafter, the points are moved by the rotation of the joints. Just like in 3D animation. That is to say each point is influenced by the position and rotation of several joints (usually 2-4) and this relationship is called skinning weights. Skinning weights are also just a given part of the SMPL specification.
So, at a high level, SMPL creates a 3D human body in a specific pose like this:
- Load the points and surfaces in the average body to create a mesh.
- Tweak the points in the average body based on the ten numbers that describe this specific body.
- Place all the joints using the positions of the points.
- Rotate the joints according to the pose the person's body should be in.
- Move all the points according to the new positions of all the joints (using the skinning weights).
All these values (the average body, tweaking the average body, how much points affect the starting position of the joints, joint rotations, etc) are represented as vectors and matrices, which makes them very straightforward to compute on the GPU in realtime once you have them.
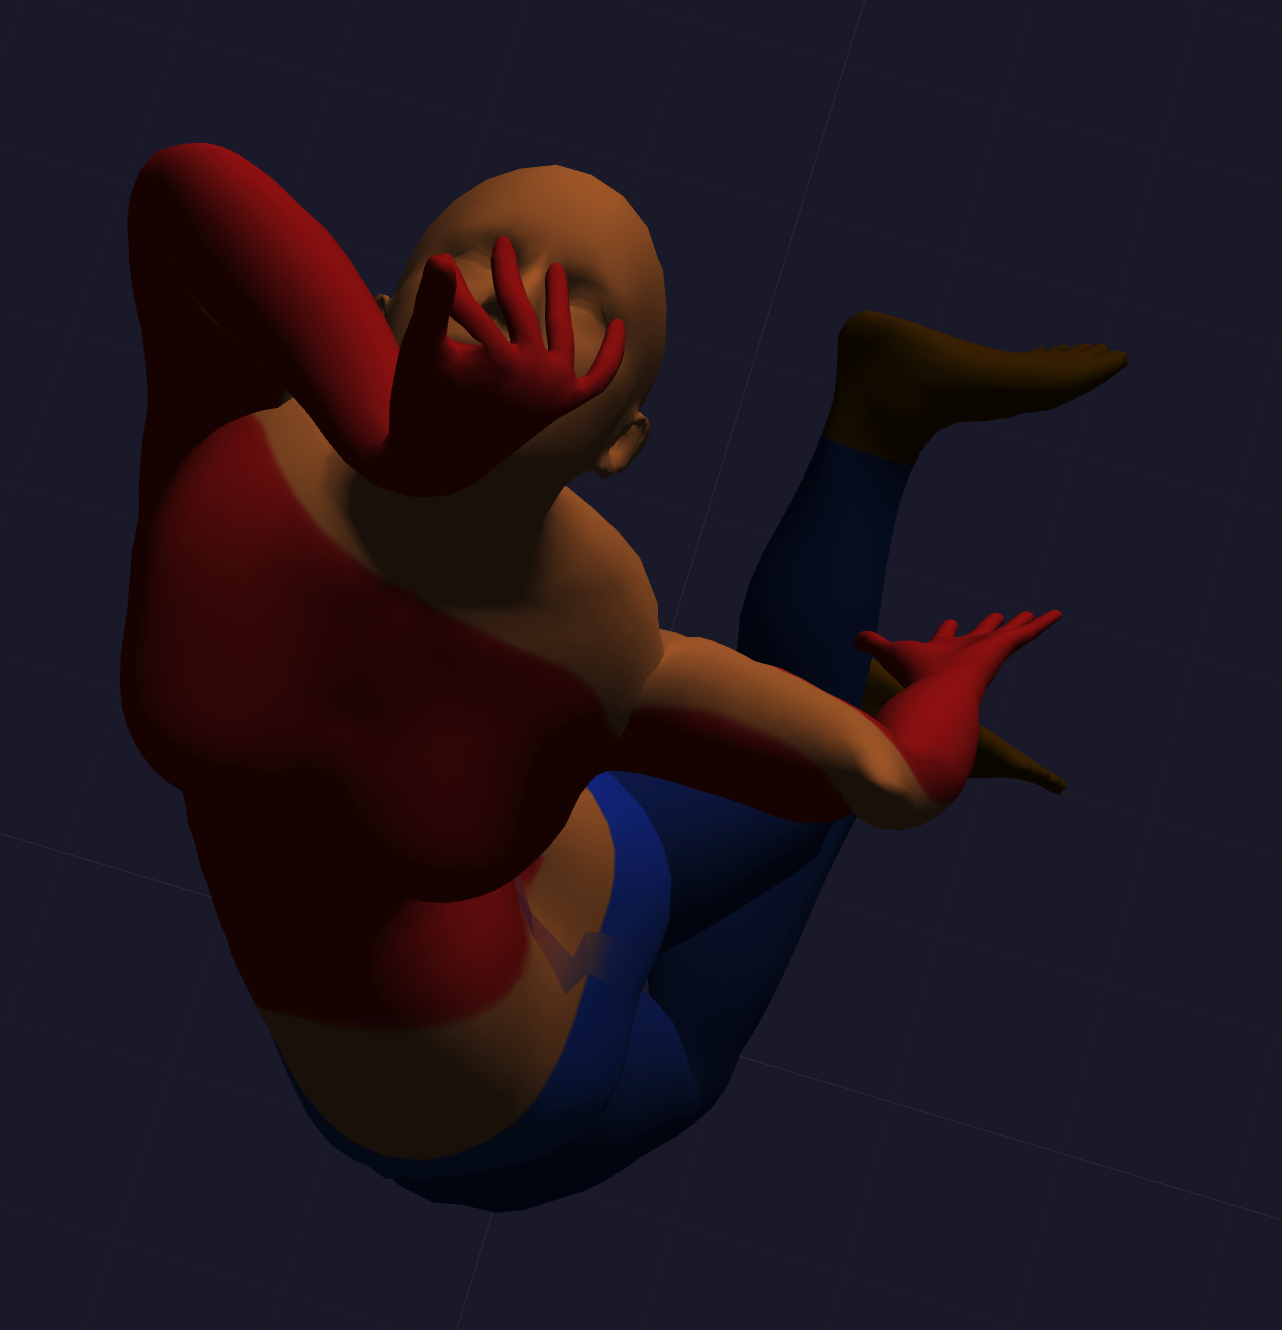
There are more data that influence the shape of the body's 3D mesh, but they are not as fundamental. For example, a pose might stretch skin or move body fat differently than the 3D model, so it needs to be adjusted. Or a person's breathing or food consumption or prior movement can make the same pose look different.
Computer Vision Backbone
Training a large Computer Vision model from scratch requires a lot of time, expensive GPUs, storage, and good training data. To that end, there's a concept in Computer Vision of separating the model into two parts: the large backbone model that takes in the image/video frame and extracts out a feature map of the image's core features and the smaller head model that uses the these core feature intermediate data to do what you want.
When you train your model, one option is to leave the backbone model as it is and run all your images/video frames through the backbone model as a preprocessing step once, then train on that feature map intermediate data. This way, the head model you produce is swappable with any other head model to produce different output.
But there may be parts of the original image that the training of the backbone model didn't include in its feature map because it didn't prioritize those aspects of the image (the loss function it used in gradient descent didn't know what was important to your model). So you can also fine-tune the backbone model while you're training your head model, producing a new set of weights or compressed transformations (LoRA [1]) for the backbone model.
Getting Joint Orientation with an HMR Head
Passing an image/video frame to a model to get parameters for a 3D body (see Parametric Body Formats) is called Human Mesh Recovery (HMR). I am using a pre-trained SMPLest-X model to infer the SMPL parameters based on each frame from the camera (technically it's the SMPL-X model which has more expressive support for hands and face).
SMPLest-X uses ViTPose [2] as a backbone model and an HMR head model to predict the SMPL-X body parameters. The backbone was fine-tuned while the head model was being trained from scratch.
The model doesn't use the raw image/video frame as input. There may be no people in view. There may be many people in view. For SMPLest-X, we first run the YOLO object detection model [3] to detect regions of the frame (bounding rectangles) where there are objects and filter for areas that are guessed to be human and for which the YOLO model is confident (more than 50% confident). The largest result is likely to be the person closest to the camera (although not necessarily).
If there's a person, we pass the video frame cropped around this biggest person to the SMPLest-X model and get back the SMPL-X body parameters. There's no need to render this 3D model. We only want the relative orientation of the joints in the arms.
I use my Macbook Air M4 to run the motion capture model. It has an average latency of 280ms (~3.6 inferences/sec). This is acceptable for the demo, although the human body can make movements and decisions much faster. Fast, repetitive movements likely won't be caught by the model; however, 280ms is not a large delay. In the final product, we always have the joints moving towards the correct orientation for the last inferred position.
While the joint orientation is good enough for mirroring the human in front of the camera, we need a second pipeline to handle shyness.
Moving the robot with an Action Head
Through my testing, I found it difficult to correctly place the inferred 3D body in the same 3D space as the robotic arm. That, coupled with my doubt in the ability to represent mirroring and shyness in a single model, led me to use a separate model to have the robot arm shy away. The model is called an action head because it is a head model after a backbone model and its output is actions the robot should take.
While technically it doesn't extract a feature map, I use Google's MediaPipe Hand Landmarker model as the “backbone model” to locate the human's hands in 3D space in relation to the robot's “hand”. Then I train a head model to take in the hand positions and current robot joint angles to predict the joint angle changes.
A demonstration of Google's MediaPipe Hand Landmarker.
I will know how far away the human's hand is from the robot arm by using an additional camera to give a more accurate, triangulated 3D position for each landmark of the hands and compare that to where the arm's joint positions says it should be (after figuring out where it is w.r.t. the cameras at the beginning).
This project uses the SO-101 robotic arm. One of its selling points is that it comes as two arms. You record video of the follower arm performing the task while you, the operator, remote-control it using the leader arm off-camera. Then you use the video and robot arm's joint positions during the training to train the head model. This is a form of imitation training.
Since our action head's inputs and outputs are so small (3D positions of hands combined with joint orientations predict joint orientation changes), the model will use a standard MLP. I just have to decide how I want shyness to show up in the training.
I could have calculated the direction the robot arm is from the human hand and moved it proportionally in the opposite direction... a simple geometric approach that you might use in game development. But I wanted to develop familiarity with training action models in robotics.
To decide whether the robot arm should be mirroring or shying away, I measure the distance of the human hands from the robot arm and switch to shyness when it passes a threshold, staying shy until the human hands move back past the threshold by some buffer.
Curious about hiring me or working together? Check out my hiring page. You can also hear more from me on YouTube or Twitter.
Footnotes
- [0] Yin, Wanqi et al. “SMPLest-X: Ultimate Scaling for Expressive Human Pose and Shape Estimation.” 2025, https://arxiv.org/abs/2501.09782
- [1] Hu, Edward J. et al. “LoRA: Low-Rank Adaptation of Large Language Models.” 2021, https://arxiv.org/abs/2106.09685
- [2] Xu, Yufei et al. “ViTPose: Simple Vision Transformer Baselines for Human Pose Estimation.” 2022, https://arxiv.org/abs/2204.12484
- [3] Redmon, Joseph et al. “You Only Look Once: Unified, Real-Time Object Detection.” 2015, https://arxiv.org/abs/1506.02640